Description from original post (created 2015-10-03 00:12):

Hi! This is my tutorial for GIMP skin making.
I've been working with GIMP for about 5 years now and I make skins commonly.
A lot of people tend to ask me how I make my skins.
It's not as complicated as it look! Hopefully this will help you with some TIPS on using GIMP.

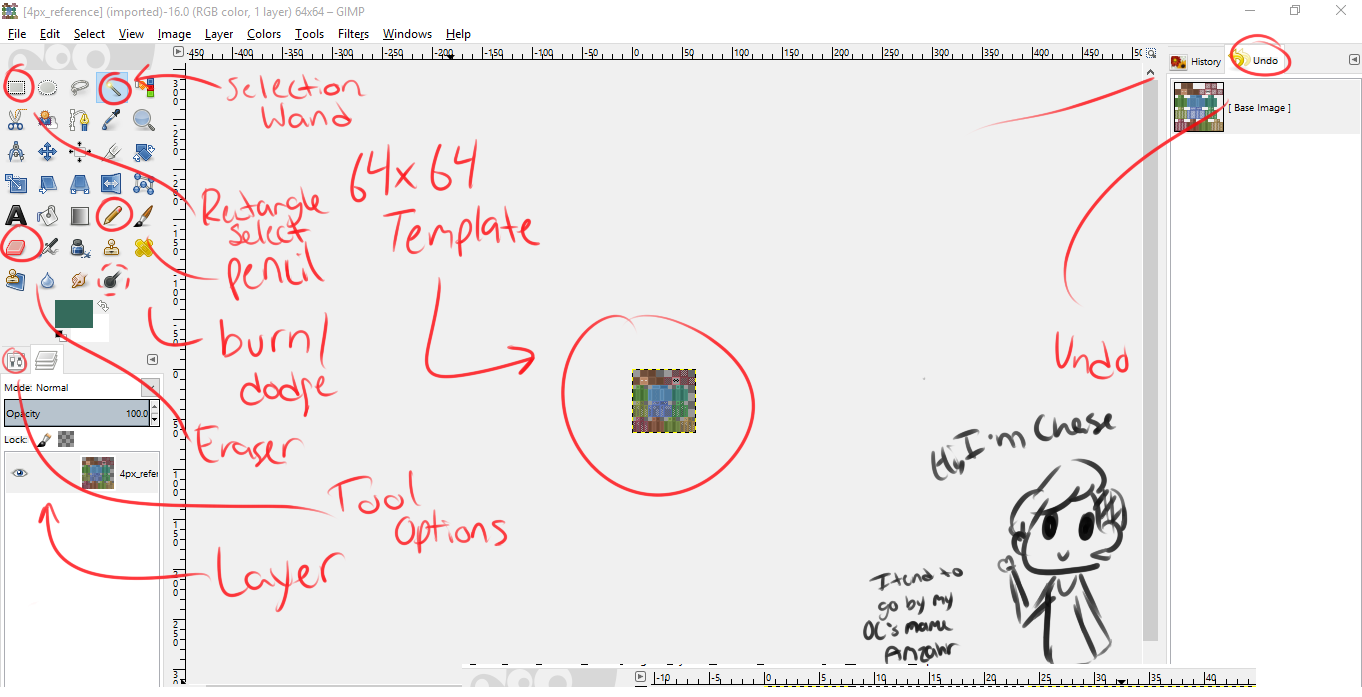
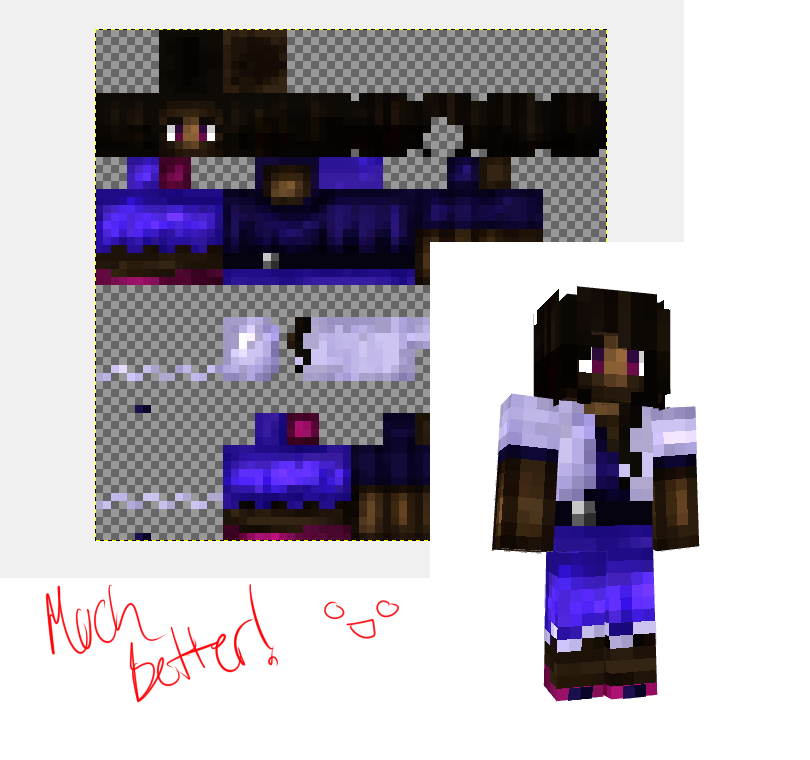
This is probably what your screen looks like when you first open a skin template!
(Probably slightly modified however)
First, Let's explain a few very useful tools!
Selection Rectangle: Makes a Rectangle around an area. This will make it so you can only draw in that part of the image that is selected. This box can be adjusted/copied/pasted.
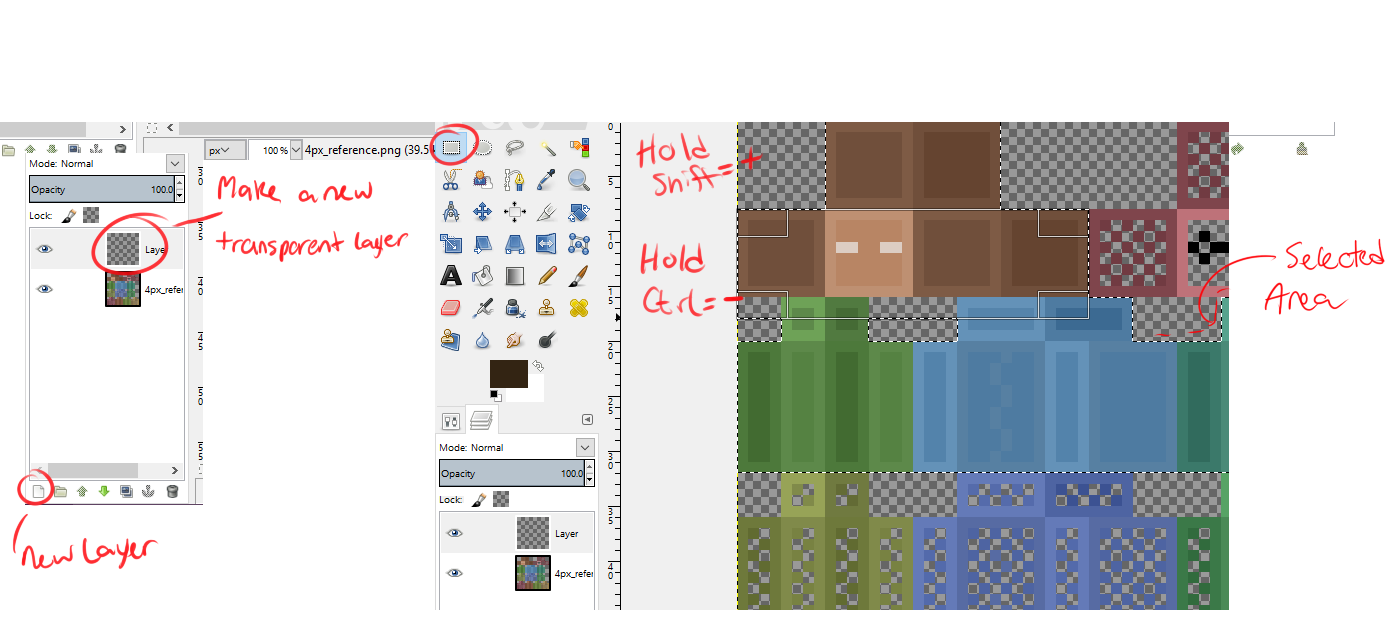
Tip: Holding Shift will allow you add more to the selection. Ctrl does the opposite.
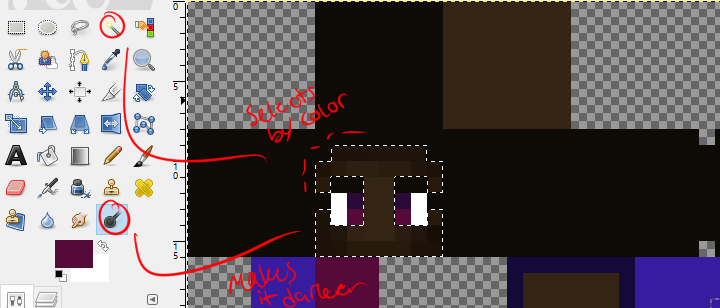
Selection Wand: Selects by whether the pixel clicked on around an area is the same color.
Tip: Holding Shift will allow you add more to the selection. Ctrl does the opposite.
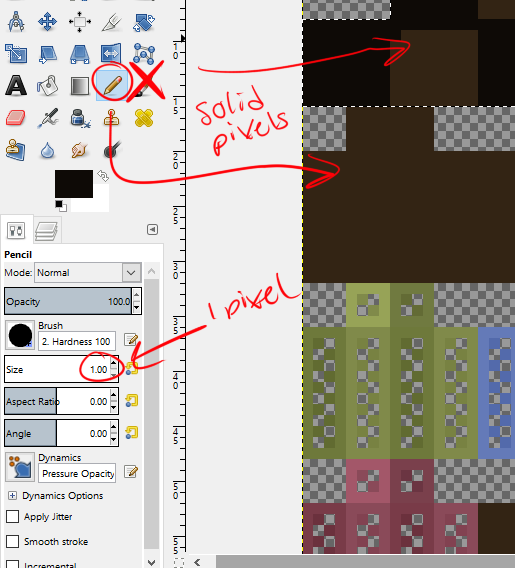
Pencil: Pencil is a non-feathered version of Paintbrush. I recommend for skins keeping it's size a 1px.
Tip: NEVER. I mean, NEVER use paintbrush on a skin unless you use a selection, this will lead to loose pixels.
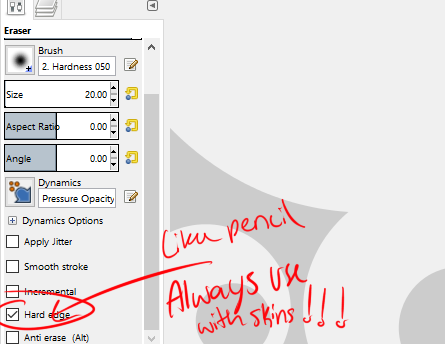
Eraser: Well, It does exactly what you think it does! It erasers things. Wait though, The eraser is feathered unless you turn on Hard Edge.
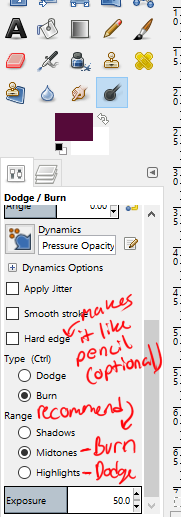
Burn/Dodge: This tool is used to lighten (dodge) or darken (burn) an area. Very useful for shading, but be careful, you can go overboard.
Tip: I recommend using Highlight with Dodge and Midtones with Burn, prevent it from becoming too gray.


Now that you are familiar with your tools, let's get onto the skin making!
You most likely are using a template of sorts to help you see where the parts of the skins are.
In my example, soild is the under layer/half-transparent is the top layer.
You are going to want to make a new layer:
There is 3 ways to make a new layer:
1. You are going to want to go to the layer dialog on your dockables and hit the the 'new layer'. This looks like a white piece of paper.
2. On your toolbar, hover over the 'Layers' tab. After a list should appear, at the very top of the list is New Layer...
3. Hit Shift+Ctrl+N at the same time.
A command box will appear.
You want to make sure this new layer is transparent! (If the background is light/dark gray checkered, Congrats! You did it correctly!)
You can also name the Layer is you want.
Now that you have your new layer, now it's time to start selecting your base.
Use the rectangle tool too select the underlayer of the skin.
Once you have the area selected, you are gonna wanna pick a color!

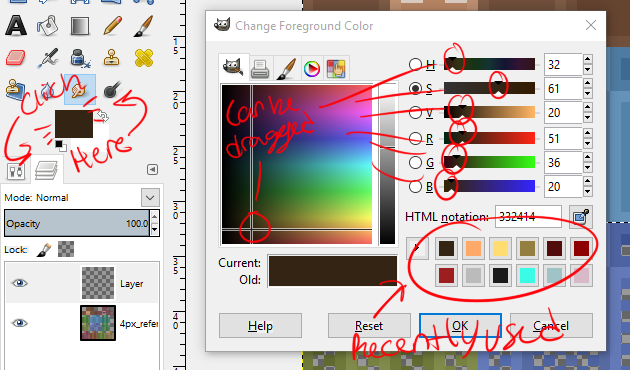
Below all of your main tools you will see a box filled with a color (as shown in the screencap).
Make sure you click the Front box. Once you do a boxed title 'Change Foreground Color' will pop up.
Here you can change colors and view/chose recently used colors. Click OK when you have a color.

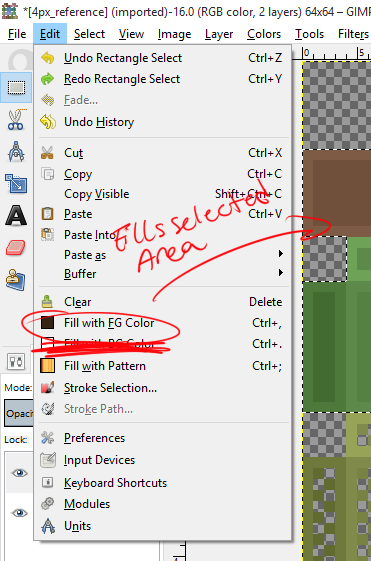
Now you are going to want to go to the Edit Tab > Fill with FG Color.
Do not Fill with BG color.
Immediately after hitting Fill with FG color, you should see the area you have selected filled with the color you selected.

Now for the pencil tool! Make sure it is at 1px and you are not using the Paintbrush.
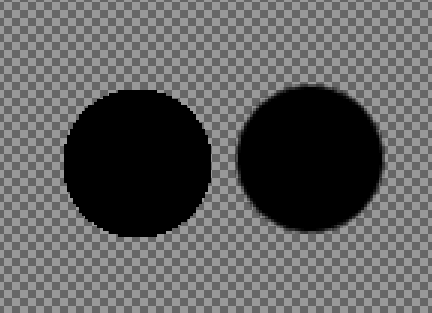
The reason I say not to use the Paintbrush is because it has feathered edges, or transparent pixels.

(Pencil V. Paintbrush)
Now that you have a base, you can use the pencil tool to add detail to your skin, if needed you can always use the selection rectangle for help.
You can't view your skin 3D in GIMP.
I recommend uses a site like Miners Need Cool Shoes for viewing, this will require you to save to upload it.
Personally I used a Google App called Minecraft Skin Viewer.
Once details are added, your skin should be pretty much done! 
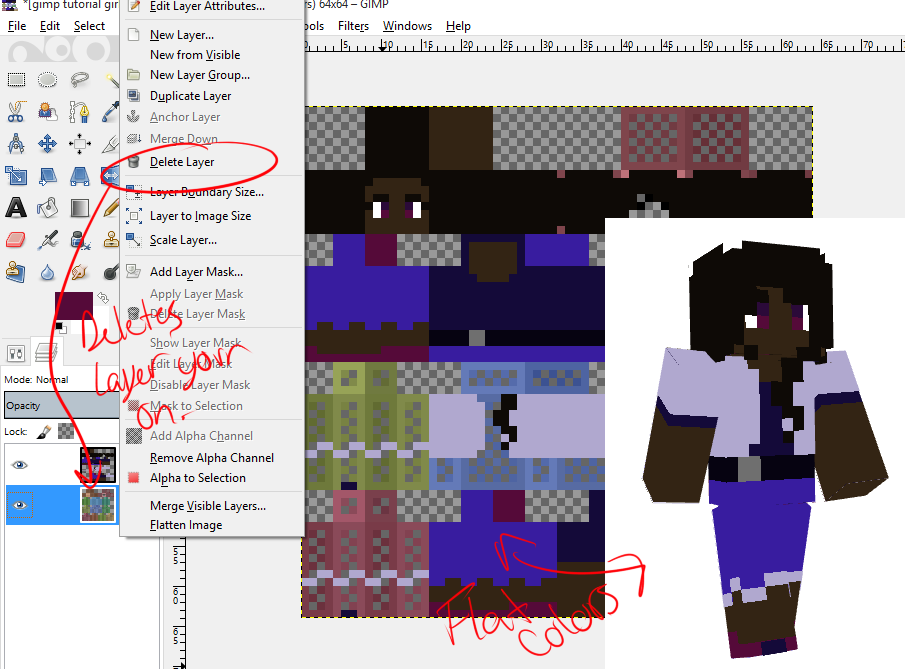
You might be noticing however, you still have that template layer. This can be easily removed.
You are going to want to either
1. Go to your layers dockable and right click the layer you want to delete, then a list will appear: choose Delete Layer.
2. Layers Tab > Delete Layer.
"Wait! I want shading on my skin!"
Shading also isn't that hard to do!
It's time to pull your dodge/burn tool!

First, you are going to want to put your to tool to burn (preferably also midtones) and shading around the area of the skin you want shaded. Be reasonable with it, shade in the proper areas. Also, be careful, burning to much can lead to super dark areas.

You can use the selection wand to select an area by click on a pixel, with will select pixels of the same color around it.

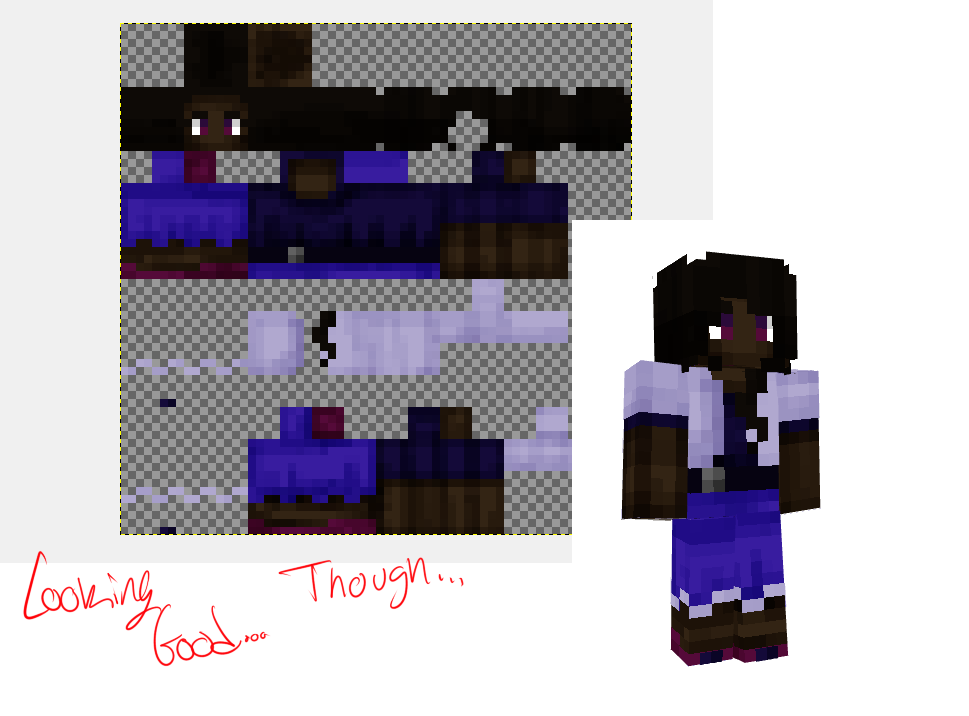
Now that's starting to look shaded! though now it kinda feeling a bit too dark. (if you like it that way then stop here!)
Now, switch your burn tool to the dodge setting and highlight, to the same expect lighten the areas on the skin that would be lighter.
Once again, be careful how much dodge you put, you can overdo it.

And there you go! You now have a skin, with proper shading!
I hope this guide helped you. This is my first time making a guide so if it is a bit hard to read, please tell me so I can fix it.
Also, don't be afraid to ask me questions! Whether it is about skins or GIMP, I will try to help (and might add it to the guide!)